Adding an SSO connection
Navigate to SSO Connection Page
1. Open the SSO Connection tab
8. Sign Request Algorithm Digest
Export Metadata for Identity Provider Integration
The SSO (Single Sign-On) Setup page allows administrators to configure a new connection for your organization. This setup enables users to securely authenticate using an external identity provider (IDP).
Navigate to SSO Connection Page
-
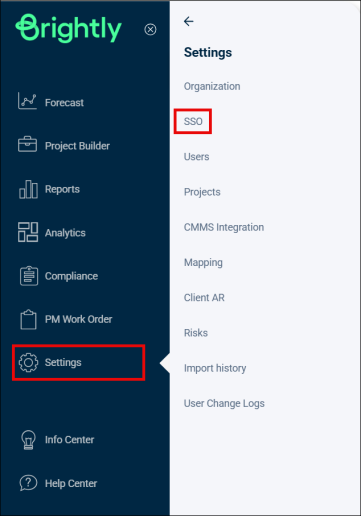
Navigate to Settings > SSO.
Only users with admin privileges can configure SSO settings.
Set Up a New Connection
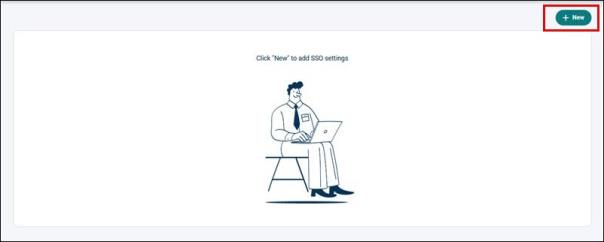
The SSO Connection page will remain empty until you create a new connection. Currently, you can set up a maximum of five connections. The steps to create a new connection are as follows:
1. Open the SSO Connection tab
-
Click the +New button.
It will open a new SSO Connection tab to add the details of the new connection.
2. Select SSO Type
-
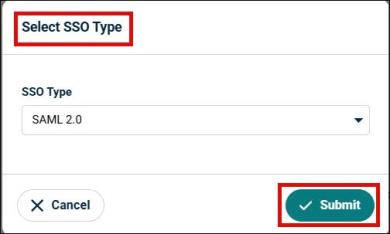
The SSO Type is currently set to SAML 2.0 by default. All the fields and options below correspond specifically to this selection.
3. Connection Name
-
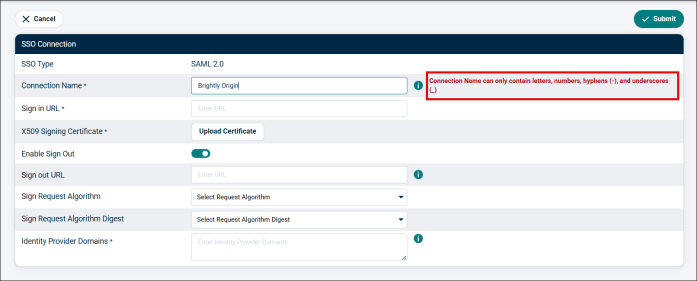
Enter a unique name for your SSO connection in the Connection Name field. This name identifies the connection. The connection name is a logical identifier of the connection. This name cannot be changed.
NOTE The Connection Name can be up to 127 characters long and may include letters, numbers, hyphens, and underscores. Spaces are not allowed.
4. Sign in URL
-
Enter the sign-in URL provided by your identity provider (IDP) in the Sign in URL field.
This is the link where authentication requests will be sent during the sign-in process. This can be found at the IT team->identity provider (IDP) setup.
5. X509 Signing Certificate
-
Click the Upload Certificate button, then select the X509 (.cer)/ (.pem) file provided by your identity provider.
The X509 Signing Certificate is a .cer/ .pem file that has encrypted values for securely validating all the communication protocol and parameters that need to be established between two servers. This is provided by the IDP that the client is using.
NOTE The size limit for this certificate is 20 MB.
6. Enable Sign Out
-
Toggle Enable Sign Out as needed. It is disabled by default.
-
If the Sign Out is enabled, then a new field appear to enter the Sign out URL.
The sign-out URL is the link where the users will land when ending their session.
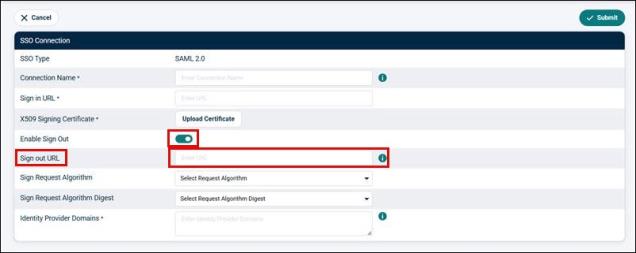
7. Sign Request Algorithm
-
Select the appropriate Sign Request Algorithm from the dropdown.
-
Currently the system supports two algorithm RSA-SHA256 and RSA-SHA1.
8. Sign Request Algorithm Digest
-
Select the Request Algorithm Digest for request signatures from the dropdown.
-
Currently the two options are present SHA256 and SHA1.
9. Identity Provider Domains
-
In the Identity Provider Domains field, enter the domain names that are associated with your identity provider. Separate multiple domains with commas (e.g., brightlyabc.com, brightly.com).
-
The domains entered in this field must also be configured in the Identity Provider (IDP) setup or else the SSO will not work for that domain.
NOTE You may enter up to five domains in this field.
10. Submit the Configuration
-
Review all the entered details.
-
Click the Submit button to save the new SSO connection.
Once submitted, the connection appears in the SSO connection list.

Export Metadata for Identity Provider Integration
-
Download the XML File
-
Once the Connection is submitted, a Download XML file option becomes available beneath it.
-
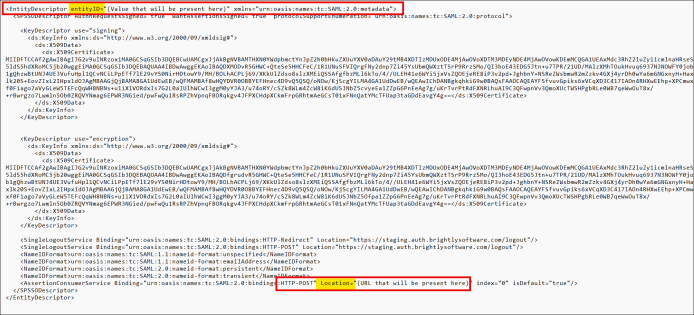
This XML file contains the necessary metadata that needs to be added to the Identity Provider (IDP) so that it can recognize and authenticate the application's login requests.
2. Set Up in IDP
-
Use the details from the XML file you downloaded in the previous step and add them to your Identity Provider (IDP). This allows the IDP to authenticate Origin users during login.
-
You can extract the following details from the XML file:
-
EntityID
-
Location
-
Invite a New User
After the SSO connection has been set up, the next step is to invite the users onto the platform.
-
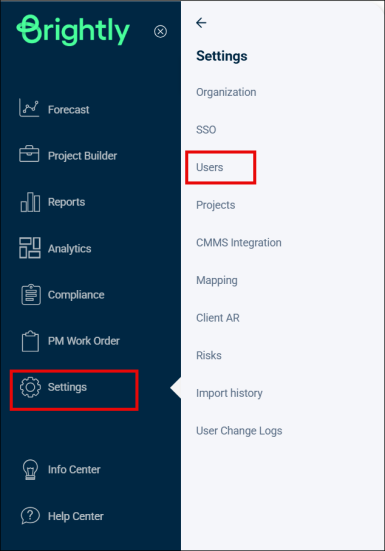
Click Settings> Users.
-
On the User Page, click the + Add User button.
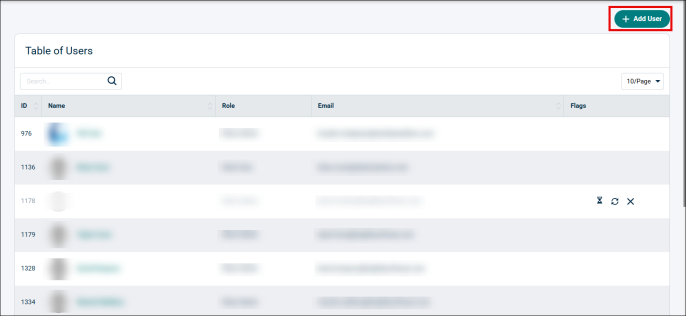
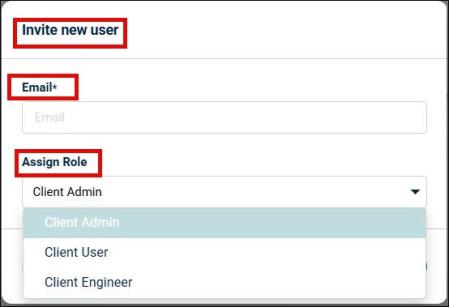
Invite new user pop-up will open.
-
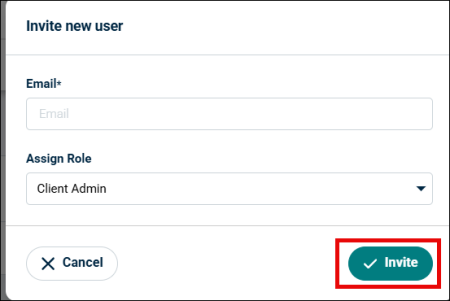
Enter the email address and assign a Role to the new user.
-
Click the Invite button to send the invitation mail.
NOTE If the domain has already been entered in the Identity Provider Details field above and an SSO connection is enabled for it, users will be taken directly to the Origin login page via the link in their invitation email. They will not need to set up a password like other users.
Login to Origin through SSO
Once the user clicks the link in the invitation email, they will land to the Origin login page.
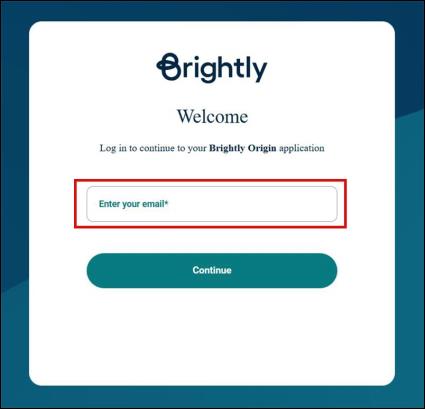
-
Enter the email address with the domain configured in the IDP details and click Continue.
-
The user will be redirected to the IDP portal for authentication.
-
Enter the email address and password for the IDP account and click Login.
-
After successful authentication, the user is redirected to the Update Profile Details page on Origin.
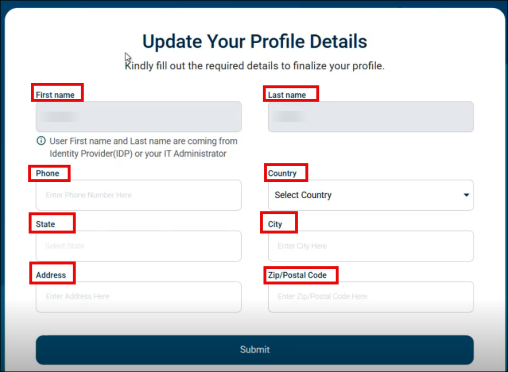
This page appears to the user the first time they log in. Here, the user is required to enter their details. For SSO users, the First Name and Last Name fields are already populated based on information from the IDP.
-
Once all the required details are filled in, click Submit.
-
The user will then be taken to the Origin dashboard.
NOTE After logging out, SSO users can log in to Origin again by entering their email address. Since they are already authenticated through the IDP, they do not need to enter their credentials and will be taken directly to the Origin platform. If a user’s email domain is not included in the SSO setup, they will follow the standard invitation process and be required to set up a password for login.To understand the login process, refer this: Adding a new user, Changing password, Viewing and editing user details.
